Seven keys to food safety and a healthy diets

By C. Stevens, teacher at AIT L’Ametlla

Why what you eat matters

Your health depends, in part, on what you eat. If you maintain food safety and a healthy diet, you can improve your health.

In contrast, unsafe food practices and unwholesome food lead to serious health problems, just as poor-quality fuel can lead to car problems. They may not appear immediately, but they will come.

The World Health Organization (WHO) states that “every country in the world is affected by one or more forms of malnutrition”.

Four keys to food safety

1. Prepare food safely. Why? Dangerous germs in contaminated food and water can enter your body and make you sick.

Health experts recommend:
• Before you prepare food, wash your hands with soap and water.
• Use soap and water to wash cutting boards, dishes and anything else that will touch food.
• Wash all fruits and vegetables.

2. Separate raw and cooked foods. Why? Germs from raw food such as meat and its juices will contaminate other food.

Health experts recommend:
• Separate all raw foods -especially meats- from prepared foods when you carry them home from the market and store them.
• After cutting raw meat, thoroughly wash your hands, the knife, and the cutting board before cutting any other food.

Seven keys to food safety and a healthy diets

3. Make sure food that needs to be cooked is cooked thoroughly. Why? Harmful germs are killed only if the food reaches a high enough temperature.

Health experts recommend:
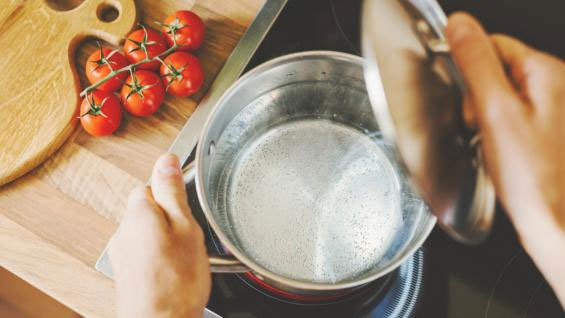
• Cook food until it is very hot. Food including the innermost portion of meat. Must reach 70 degrees Celsius (160ºF) for at least 30 seconds.
• Bring soups and stews to a boil.
• To eat previously-cooked food, reheat it until it is hot and steaming.
Seven keys to food safety and a healthy diets

4. Keep food at safe temperatures. Why? If food is stored at a temperature between 5 and 60 degrees Celsius for just 20 minutes, the number of bacteria in it can double.

Health experts recommend:
• Keep food hot or cold, not lukewarm, to slow or stop germs from multiplying.
• Never leave food sitting at room temperature for more than two hours, or for more than one hour if the room temperature is over 32 degrees Celsius.
• After it is cooked, keep food hot until just before serving.

Three keys to healthy eating

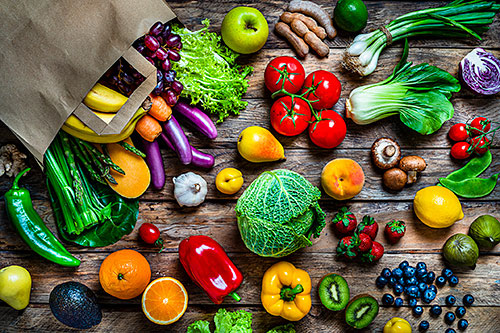
1. Eat a variety of fruits and vegetables every day.
2. Eat only moderate amounts of fats and oils.
3. Limit your intake of salt and sugar.
Seven keys to food safety and a healthy diets

QUESTIONS

1. In part, what does your health depend on?
2. What does the World Health Organization (WHO) states?
3. Why do we have to separate raw food from cooked food?
4. Is this stamen true? “We can keep food at a room temperature for more than five hours” Why or why not?
5. “It is safe to reheat food after has been cooked” Is this true?

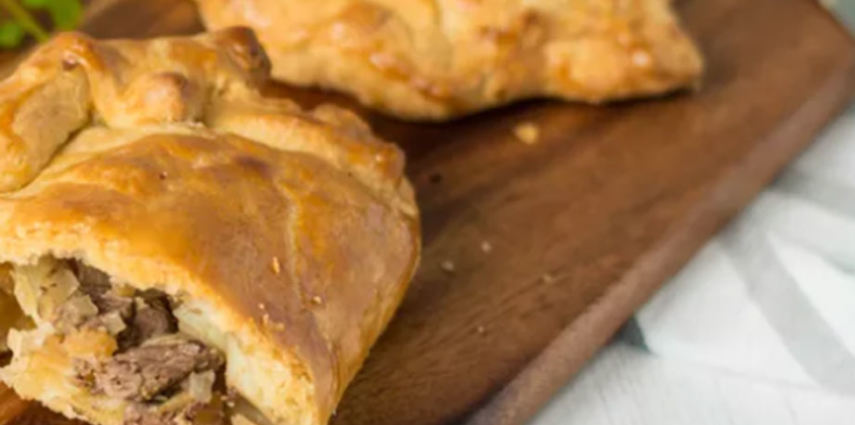
Miner’s Delight: The History of the Cornish Pasty

En 2011, las empanadillas de Cornualles recibieron una Denominación de Origen Protegida. Conoce más acerca de esta receta tradicional.

         The Cornish pasty is known and loved throughout Great Britain and has long been part of its heritage.

It is believed the pasty originated with Cornish tin miners who, unable to return to the surface at lunchtime, could still enjoy a hearty meal. With their hands often dirty from a morning’s work, the pasty could be held easily by the thick pastry crust without contaminating the contents.

The traditional Cornish pasty recipe is perfect for a lunchbox, but also makes a great main course dish when served with fresh vegetables and must be considered one of the first-to-go foods. This recipe uses a short crust pastry made by hand or in a food processor, but if you are short of time, a ready-made pastry will do fine.

In 2011, Cornish pasties were given a Protected Designation of Origin and Protected Geographical Indication (PGI) status. For producers to be able to place these designations on their food packaging, they must be prepared in accordance with strict parameters using authentic ingredients and traditional methods of cooking to preserve their integrity. 


Ingredients

  • For the Pastry
  • 1 cup flour
  • Pinch salt
  • 2 ounces butter (or half lard and half butter, cubed)
  • 2 to 3 tablespoons water (cold)
  • For the Filling 
  • 1/4 cup onion (finely chopped)
  • 1/2 cup potato (cut into 1/4-inch dice)
  • 1/2 cup swede (cut into 1/4-inch dice)
  • 1/2 cup rump steak (cut into small cubes)
  • Salt (to taste)
  • Freshly ground black pepper (to taste)
  • 1 large egg

ENJOY!!!

Chocolate Chip Cookies

Recipe by Alicia Martínez (German and English Teacher at AIT Language School)

Hoy os traemos una receta fácil y rápida para hacer galletas de chocolate caseras. ¡Riquísimas!

Ingredients:

  • 1/2 cup butter
  • 1/2 cup shortening (might prove problematic in Barcelona, but I have successfully found other forms of hardened vegetable oil that have done the trick; when in doubt, just use more butter)
  • 1.5 cups packed whole brown sugar
  • 2 eggs 2 tsp vanilla extract
  • 2 cups flour (if not feeling adventurous, use a mix of white and whole wheat)
  • 1 teaspoon baking soda
  • 1/2 teaspoon salt
  • 2 cups chocolate chips.

Elaboration:

In a large bowl put cream together with butter and shortening. Gradually add sugars, Creaming thoroughly. Beat in eggs and vanilla. In separate bowl combine flour, baking soda and salt; blend into creamed mixture.

Stir in chips. (at this point, chill dough for a few minutes to firm it up; cookies will retain their shape better). Drop butter by spoonfuls onto lightly greased baking sheets.

Flatten slightly. Bake in 190°C oven for 8 to 9 minutes until golden brown but still slightly underbaked. Remove from oven and let stand on sheets for 5 minutes (they’ll continue to cook a bit), then remove to racks to cool completely.

It’s the time in oven you have to watch like a hawk because there does come a moment where all that sugar and butter crystallize.

St. Patrick’s Day Recipes

En el artículo de esta semana os dejamos algunas recetas interesantes típicas de St. Patrick’s Day

St. Patrick’s Day is always on 17th March.

St. Patrick was patron saint and national apostle of Ireland who is credited with successfully bringing Christianity to Ireland.

March 17th is widely accepted as the date of St. Patrick’s death in A.D.461.

St. Patrick was born in Britain as Maewyn Succat. At age 16, he was kidnapped from his home on the west coast and carried off to Ireland to become a slave who worked as a shepherd. After six years, he escaped; upon returning home, he received his call in a dream to preach the Gospel. When he became a priest, his name was change to Patricius, and eventually, Patrick. He spread Christianity throughout the land.

The first St. Patrick’s Day parade in America was held in New York city in 1762.

 The Shamrock

We wear a shamrock on St. Patrick’s Day because, legend says, St. Patrick used its three leaves to explain the Holy Trinity.

 There are a few dishes that are traditional on this day.

Here you can find some of them. Enjoy!

St. Patrick’s Day dinner recipes

Corned Beef and Cabbage

Ingredients:

  • 4 pounds corned beef
  • Cold water
  • 1 spring thyme, several springs parsley bound together
  • 1 onion stuck with 6 cloves
  • Pepper
  • 2 onions
  • 1 whole carrot
  • 1 2 pound cabbage

Instructions:

Tie the beef neatly, put it into a large pot and cover it with cold water. No salt is needed. Add the other ingredients except the cabbage and bring very slowly to a boil with the lid off the pot so that you can see what is happening. Simmer very gently for 3 hours skimming as necessary. Remove the thyme, parsley, and cloved onion. Now add the cabbage which has been cut in 8 pieces and simmer for a further 15 minutes. Remove the meat and cut the string. Place on a hot platter and surroung with the drained cabbage. Dot with butter and sprinkle with finley cut parsley. Serve with horseradish or mustard sauce.

Luck of the Irish Peppermint Brownies

Ingredients:

  • 4 squares unsweetened chocolate
  • 1/2 cup butter
  • 2 cups sugar
  • 4 eggs, beaten
  • 1 teaspoon vanilla extract
  • 1 cup sifted flour

Instructions

Preheat oven to 325ºF. Grease a 9×9 inch baking dish.

In a double boiler over not-quite-simmering water, melt chocolate and butter and stir until smooth. Cool slightly. Stir in sugar. add eggs, one at a time, beating thoroughly. Stir in vanilla, then add flour. Spread in prepared pan and bake for 40 minutes. Cool in the pan.


TOPPING

Ingredients: 

  • 1 container (16 ounces) cream cheese frosting
  • 1/2 teaspoon peppermint extract, or more to taste
  • 3 to 4 drops green food coloring
  • 5 ounces semisweet chocolate
  • 1/2 cup heavy cream or milk

Instructions

Put cream cheese frosting into a bowl and add peppermint extract and food coloring. Spread evenly over cooled brownies.

In a pan over low heat, melt chocolate with heavy cream. Let cool slightly and drizzle or spread evenly over the frosting.

Let chocolate set up, at room temperature, and then cut brownies into squares.

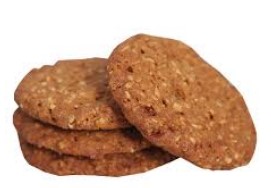
Oatmeal and Tangerine Cookies with Olive Oil

By Alicia Martínez, German and English Teacher at AIT Language School

Practica tus habilidades de lectura (y de cocina) con el artículo de esta semana: ¡Una receta de galletas de avena!

You were on a diet and have lost the desired weight? CONGRATULATIONS! Now your aim is to maintain what you have reached but you cannot avoid eating some sweet? Here we have an easy and delicious recipe to enjoy a sweet without having remorse.


Ingredients:

  • 3 tangerines or an orange (juice and grated)
  • 100 gr whole wheat flour Oatmeal and Tangerine Cookies with Olive Oil
  • 200 gr of fine oat flakes
  • 100 gr of brown sugar
  • 100 ml virgin olive oil
  • 2 teaspoons of cinnamon
  • 1 egg
  • 1 teaspoon of chemical yeast
  • 1 pinch of salt
  • 1 teaspoon of honey

Preparation

  1. Grate the skin of the tangerines or orange and extract both their juice.
  2. Put the grated rind, the flour, the oats, the brown sugar, the yeast and the salt in a bowl and mix everything well.
  3. Make a hole in the center and add the egg, the oil, the juice of the tangerines or the orange and the honey and mix it again.
  4. Wet the hands and make small balls that we will put in the oven tray previously covered with vegetable paper.
  5. Flatten them lightly with your hands. – If we want them spongy or crispy depends on the thickness-.
  6. Put them in the oven previously preheated to 200º (up and down) for 10 or 15 minutes until they are golden brown

As optional ingredients to vary the flavor you can add chocolate chips, nuts or raisins.

Enjoy it!

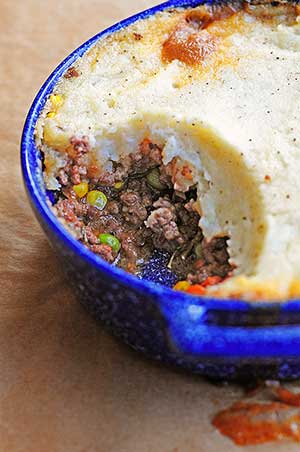
Hearty Shepherd’s Pie

¡Las temperaturas bajan! Parece ser que estos días el invierno volverá con las pilas cargadas, así que hoy queremos compartir una receta de origen irlandés llamada Shepherd’s Pie.

Se trata de un pastel de carne muy fácil de preparar y es ideal para combatir el frío invernal.  Enjoy your meal!


Preparation time: 30 min
Cook time: 45 min

Ingredients

shepherds pie receta

For the potatoes:

  • 2 pounds red skinned (or russet) potatoes, peeled and diced
  • 1/4 cup heavy cream (or 1/2 and 1/2)
  • 6 tablespoons salted butter
  • 1/2 teaspoon salt
  • ‘A teaspoon ground black pepper
  • 1 egg yolk, beaten

For the meat filling:

  • 2 pounds ground beef or ground Iamb
  • 3 tablespoons canola oil
  • 1 medium-large onion, chopped (about 11/4 cup)
  • 2 carrots, peeled and diced
  • 2 gloves garlic, minced
  • 1 teaspoon salt
  • 1/2 teaspoon ground black pepper
  • 2 tablespoons 1 teaspoon all-purpose flour

How to cook Shepherd’s Pie

Preheat oven to 400°F and line a baking sheet with parchment paper. You’ll need one 11×7″ baking dish or approximate.

Place diced potatoes in medium saucepan, cover with cold water, and bring to a boil over medium heat. Decrease to a simmer and cook until tender. About 10-15 minutes.

Drain the potatoes and return to the saucepan. Add cream (or ‘/z and 1/2), butter, salt and pepper. Cover with lid to let butter melt. Once butter has melted mash potatoes until smooth. Stir until combined. Add in beaten egg yolk and stir again until combined. Cover and set aside until ready to use.

While potatoes are cooking, brown hamburger meat in large skillet or sauté pan, drain, and remove from pan.

Add the canola oil to the skillet/sauté pan and heat over medium high until it shimmers. Add the onion, and carrots and sauté for 3-4 minutes.

Stir in the garlic and cook for about 30 seconds.

Next, add the browned beef, salt and pepper. Combine well and cook for about 3 minutes over medium. Sprinkle the meat mixture with flour and toss to coat. Cook for another minute. Stir in the tomato paste, chicken broth, Worcestershire, rosemary, and thyme into the meat mixture. Combine well, cover and simmer for 10-12 minutes, until the sauce slightly thickens.

Finally, add the corn and peas to the meat mixture, and mix together.

Transfer beef mixture to an 11×7″ baking dish (or approximates). Smooth mashed potatoes across top, taking care to cover the whole top all the way to the edges. It helps to use a rubber spatula to create a seal. This prevents the mixture from bubbling out too much.

Place baking dish on a parchment lined baking sheet and bake on the middle rack of 400°F oven for about 25 minutes, or until the potatoes just begin to brown.

Cool a bit before serving.


Source: https://www.buzzfeed.com/jenniferschaffer/yum-british-food?utm_term=.dbMdYy8zww#.ja7kXmPerr 

Spooky & Tasty Halloween Biscuits!

Halloween Piñata Biscuits

Las celebraciones actuales de Halloween se caracterizan por su marcado estilo norteamericano: la gente se disfraza y celebra fiestas, los niños van de casa en casa entonando el ya conocido «truco o trato» y, cada vez más, se elaboran platos de temática terrorífica. Y este es el tema de la entrada de hoy: la comida.

Aunque lo que se come actualmente para Halloween -especialmente dulces- poco tiene que ver con las recetas tradicionales, la comida siempre ha sido una parte importante de esta celebración. Y no sólo por el aspecto nutritivo: las plantas sagradas o los alimentos como las bellotas, frutos secos o manzanas no sólo se comían, sino que también se utilizaban para rituales de adivinación. Por ejemplo, se decía sí lanzabas la monda de una manzana por encima de tu hombro izquierdo, ésta se curvaría con la forma de la inicial del nombre de tu futuro esposo o esposa.

La receta de hoy no tiene nada que ver con la brujería o la adivinación, sino con los espíritus… Os traemos una receta para hacer unas divertidas galletas-fantasma que no dejaran indiferente a nadie. Happy Halloween!

Ingredients

For the biscuits

Halloween piñata biscuits / BBC Good Food

  • 200g unsalted butter, softened
  • 200g golden caster sugar
  • 1 large egg 
    ½ tsp vanilla extract (= 5ml aprox.)
  • 400g plain flour, plus extra for dusting
  • 20g silver balls
  • 20g popping candy

For decoration

  • White, black and grey sugar paste
  • 100g icing sugar


Method

  1. Heat oven to 200C/180C fan/gas 6 and line a baking sheet with baking parchment.
  2. Put the butter in a bowl and beat with electric beaters until soft and creamy. Beat in the sugar, then the egg and vanilla, and finally the flour to make a dough. If the dough feels a bit sticky add a little more flour and knead it in. Wrap in cling film and put in the fridge for half an hour.
  3. Heavily flour a surface and cut the pastry in half. Roll out one half to 5mm thickness. Using a cookie cutter in the shape of a ghost (or any spooky shaped cutter you like), cut out 12 ghost shapes, which will make 4 cookies. Put the cut shapes on a baking tray lined with baking paper and put back in the fridge. Repeat with the second half of the pastry. Swap into the fridge, taking the chilled ghost biscuits out.
  4. Using a smaller cutter or a knife, cut a ghost-shaped hole in the middle of 4 of the biscuits on the tray, this is the space to store the surprise centre! Put these biscuits into the oven to bake for 10-12 mins, until pale but cooked through. Transfer to a wire rack to cool. Repeat with the other tray.
  5. Once all the biscuits have cooled completely, they are ready to be assembled. Mix the icing sugar with 3 tbsp of water and mix well. It should be quite thick so add a little more icing sugar if the mixture is too runny. Take a biscuit without the centre missing, and spread or pipe a little icing around the edge. Press a biscuit with a centre missing on top, then sprinkle silver balls into the pocket that you have created. Spread icing on the edge of the second biscuit and press another whole biscuit on top. Set aside to firm up. Make sure you leave them for a while so they don’t slide when you are finishing the decoration.
  6. Once the biscuits feel firm and the icing has set, use the sugar paste to decorate them as you please, rolling it out, cutting it to shape and topping the biscuits. You may have to use a little of the icing to glue it down. Decorate with icing pens if you like.

Recipe from BBC Good Food 

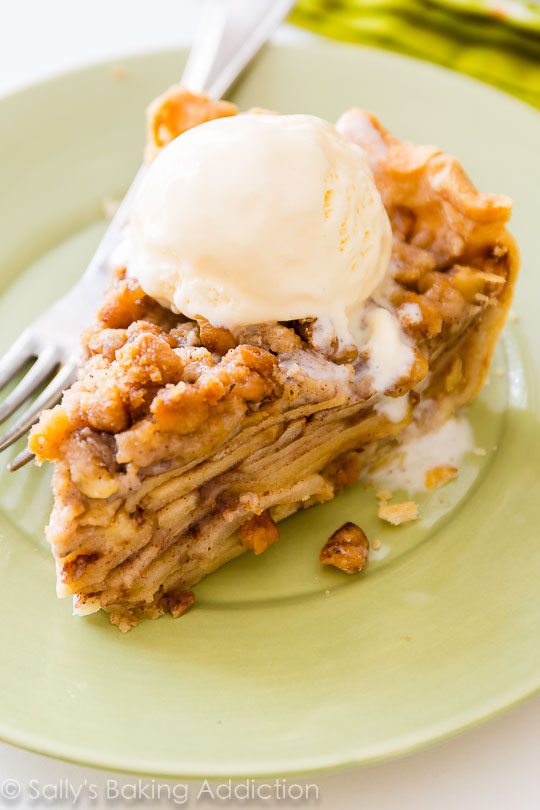
Apple Crumble is delicious… yum!

We love Fridays as much as we love good food. Fridays are special -the weekend is around the corner, you feel relaxed and optimistic… So today is the perfect day to try a delicious classic.

Bake the best Apple Crumble with this recipe!

Apple Crumble

Ingredients

For the filling

  • 575g Bramley apples (3 medium apples), peeled, cored and sliced to 1 cm thick 
  • 2 tablespoon (tbsp) golden caster sugar

For the crumble

  • 175g plain flour
  • 110g golden caster sugar
  • 110g cold butter

For the topping (optional)

  • 1 tbsp rolled oats
  • 1 tbsp demerara sugar
  • double cream, clotted cream or custard, to serve

Method

  1. Preheat the oven to 190C/170 fan/gas 5. Toss the apples with the 2 tbsp sugar and put in a 23cm round baking dish at least 5cm deep, or a 20cm square dish. Flatten down with your hand to prevent too much crumble falling through.
  2. Put the flour and 110g sugar in a bowl with a good pinch of salt, slice in the butter and rub it in with your fingertips until the mixture looks like moist breadcrumbs. Shake the bowl and any big bits will come to the surface – rub them in. Alternatively, pulse in a processor until sandy (don’t over-process).
  3. Pour the crumb mix over the apples to form a pile in the centre, then use a fork to even out. Gently press the surface with the back of the fork so the crumble holds together and goes crisp, then lightly drag the fork over the top for a decorative finish. Sprinkle the oats and demerara over evenly, if you wish.
  4. Set on a baking tray and put in the preheated oven for 35-40 minutes, until the top is golden and the apples feel very soft when you insert a small, sharp knife. Leave to cool for 10 minutes before serving. Source: BBC Good Food

    Apple Crumble and ice-cream / Sally’s Baking Addiction

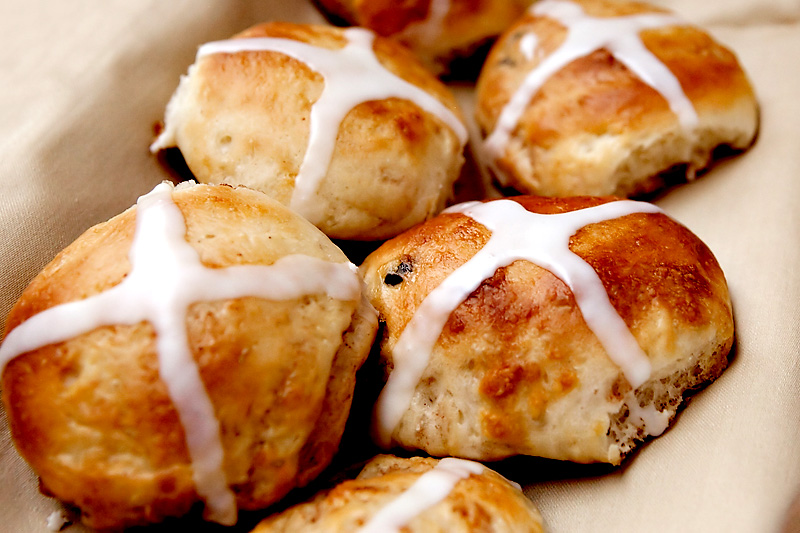
Easter is delicious! Hot cross buns

En el Reino Unido es tradición comer hot cross buns por Pascua además de los típicos huevos de chocolate.

Los Hot cross buns son unos panecillos especiados que contienen fruta deshidratada en la masa (pasas, naranjas, albaricoque…). Su nombre hace referencia a la cruz (cross) que decora la parte superior. Normalmente se elaboran y se comen en Viernes Santo.

Los hot cross buns son deliciosos, por eso hoy queremos compartir una receta del famoso cocinero británico Jamie Oliver. Tiene fama internacional, de modo que es bastante fácil conseguir sus libros de recetas traducidos a nuestro idioma.

Además, después de la receta encontraréis dos vídeos para ayudaros a cocinar. El primero es de la británica Mary Berry, que os enseñará a hacer panecillos al estilo tradicional, y el segundo es de la canadiense Nicole Knegt, con la que aprenderéis a hacer hot cross buns sin gluten.

¡Es hora de cocinar y practicar inglés!


Hot cross buns

Hot cross buns


makes  12

cooks in  2H 30M

difficulty  not too tricky

Ingredients

  • 200 ml semi-skimmed milk
  • 55 g unsalted butter
  • 2 x 7 g sachet dried yeast
  • 455 g strong bread flour, plus extra for dusting
  • 1 teaspoon sea salt
  • 1 teaspoon mixed spice
  • 1 teaspoon cinnamon
  • ½ whole nutmeg
  • 55 g caster sugar
  • 2 pieces stem ginger
  • 1 large free range egg
  • 2 tablespoons plain flour
  • 55 g sultanas or raisins
  • 30 g dried cranberries
  • 2 tablespoons mixed peel
  • runny honey , to glaze

Method

  1. Add the milk and 50ml water to a small pan and place over a low heat for a few minutes, or until slightly warm – you should be able to dip your finger in without scalding it.
  2. Meanwhile, add the butter to a separate pan and place over a low heat for a few minutes, or until melted, then set aside.
  3. Transfer the warmed milk mixture to a medium bowl and stir in the yeast. Set aside.
  4. Sift the flour into a large bowl, then add the salt, spices, a few good scrapings of nutmeg and the sugar. Finely chop the stem ginger and stir it into the mix.
  5. Make a well in the centre and pour in the melted butter, followed by the yeast mixture. In a separate bowl, beat the egg and add it to the bowl.
  6. Using a fork, mix well until you have a rough dough, then transfer to a clean flour dusted work surface and knead for around 10 minutes, or until soft and springy.
  7. Return the dough to a flour dusted bowl, cover with a damp tea towel and leave to rise in a warm place for at least an hour, or until doubled in size.
  8. Transfer the dough to a clean flour dusted work surface. Knock the air out by bashing it with your fist, then sprinkle over the dried fruit and mixed peel and knead into the dough for 1 to 2 minutes.
  9. Preheat the oven to 190°C/375°F/Gas 5. Grease and line a large baking tray.
  10. Divide the dough into 12 equal pieces and roll each into balls. Evenly space them out on a lined baking tray as you go.
  11. Cover with the tea towel and leave in a warm place for a further 30 minutes, or until doubled in size.
  12. Meanwhile, place the plain flour and 2 tablespoons water into a small bowl and mix to a thick paste.
  13. Gently pat down the risen buns then use the batter to carefully trace a cross over the top with a piping bag or spoon.
  14. Place the buns into the preheated oven for 15 20 minutes, or until golden brown.
  15. Transfer to a wire cooling rack, brush over a little honey and leave to cool.
  16. Slice open the sticky hot cross buns, spread with a little butter and serve – delicious.

Tips

  • If you prefer, swap the raisins and dried cranberries for your favourite dried fruit – when I fancy a change, I love chopped dried apricots or sour cherries.
    • If you want to keep the buns lovely and moist for longer, soak the dried fruit in fruit juice for a couple of hours beforehand.

Fuente: http://www.jamieoliver.com/recipes/bread-recipes/hot-cross-buns/


Videos

Traditional hot cross buns

Gluten free hot cross buns

Descubre más en el blog de AprendeInglesToday.

Come on, let’s bake a carrot cake!

Los días de lluvia como el de hoy son perfectos para experimentar en la cocina. Por eso, hoy queremos compartir la receta del pastel de zanahoria (Carrot Cake), muy popular Estados Unidos.

Aunque desconocemos los orígenes de este pastel (hay quién incluso dice que ya existía en la Edad Media), sí sabemos que la primera receta apareció en 1827 en un libro de cocina francesa publicado en Inglaterra.

Sea como sea, el resultado es delicioso. Así que, si alguno de nuestros alumnos de l’Ametlla del Vallès o de la de La Garriga se anima a cocinar, que nos haga saber qué le parece (y, si puede ser, que nos traiga una porción…).


Carrot Cake with Cream Cheese Frosting

One 8- or 9-inch (20-23cm) double layer cake

For the cake layers

4 large eggs at room temperature
cup (60ml) 1la vegetable oil

3/4 cup (180ml) melted brown butter or more oil
1 teaspoon vanilla extract

2 cups (280g) all-purpose flour

2 cups (400g) sugar

2 teaspoons baking soda

1 tablespoon cinnamon

pinch generouseach of nutmeg and cloves

1 teaspoon salt

4 cups (13 ounces, 3759) loosely packed grated carrots
1/2 cup (60g) raisins, preferably golden raisins (sultanas)

For the frosting

1 pound (4509) cream cheese at room temperature
4 02 (1109) unsalted butter at room temperature

2-3 cups (240-3609) powdered sugar sifted
a few drops of vanilla extract

Directions
  1. Preheat the oven to 350°F (180°C). Butter and flour two 8- or 9-inch (20-23cm) cake pans and line the bottoms with parchment paper.
  2. To make the cake layers, sift together the flour, sugar, spices, baking soda, and salt. Set aside. With a handheld mixer or a stand mixer fitted with the paddle, beat the
    eggs until they are pale and frothy (they need not increase dramatically in volume). With the mixer running, drizzle in the oil and melted butter, then the vanilla.
  3. Add the dry ingredients to the eggs and mix carefully until just combined. The paddle will accomplish this easily but if you only have a hand held mixer you may want to just do it by hand.
  4. Fold in the carrots and raisins, then divide the batter between the two pans. Bake 30-35 minutes, until the surface springs back when gently touched. Cool the cakes completely before frosting. 
  5. To make the frosting, beat the cream cheese and butter together until smooth. Slowly add the powdered sugar (do this on low speed to avoid a dust cloud) and mix until light and silky. Add the vanilla.
Serving and Storage

This cake is best served at room temperature but will keep for a few days stored in the refrigerator.


Ponte en contacto con nosotros